Showing posts with label DIY. Show all posts

Monday, March 26, 2012

DIY: Fun Votive Candles


Since our wedding reception was at night time E and I wanted out reception to be filled with candle light. Some tables had lanterns instead of floral centerpieces and all of the tables had small votive candles. We wanted to have unique votives not "your average wedding votive" (whatever that may be). I was able to purchase 96 votives on http://www.craigslist.com/ for only $25.00. Craigslist is a wonderful site for finding wedding items such as candle holders that are often cheaper to buy than to rent from a venue but you probably won't ever use 96 of them again.

We then purchased 6 packages of 16 votive candles. We found our candles at Wal-Mart but you can find them at other stores. Wal-Mart actually also has a package of 96 unscented votive candles for only $29.97. Something to think about: most peole think about small tea-light candles when they think about weddings. There is a difference though between tea-light and votive candles. Most tea-light candles are small and often sit in a small metal wrap. Votive candles are thicker and are wax with no metal. Our venue suggested that we should buy votive candles because they last a lot longer tea-lights and we didn't want to risk the candles burning down before the party winded down.

Now that we had the candle holders and the votives we needed a little zazz! I had read about Washi tape in Martha Stewart Wedding Magazine so we decided to look into it some more. The major Washi tape website that I found was http://www.cutetape.com/ We chose five different tapes so that there would be different votives on each table. We chose pink, green, yellow, and orange tapes with varying patterns. We bought a 3-pack for $8.25 and then 2 separate patterns for $4.00 each with $2.97 for shipping. I should also mention that we did not use all of the tape. We had lots of Washi tape left over for other fun craft projects.

Once we had all of the materials it was time to put them together. We originally wanted to have the tape go straight around the candle holder in a horizontal stripe pattern. We soon realized that in order to do that you need straight votive candle holders NOT the traditional tapered "shot glass" shape which we had purchased. We decided that instead of fighting the candle holders we should just work with them. We decided on a shape that looked like a lemon or orange twist. We made sure to cut the tape at an angle, begin near the bottom of the glass and then roll it following the shape of the glass and then cutting it again at an angle up towards to top of the glass. This was one of the more fun DIY projects for our wedding because it did not take a lot of time and it was fun to make each glass unique rather than stressing about making them all look the same.

Materials
Glass candleholders
Votive candles
Washi tape
Scissors

Cost
Glass candleholders- $25.00
Votive candles- $29.97
Washi tape- $8.25 + $4.00 + $4.00 + $2.97
Total: 96 unique votive candles for $74.19

Monday, January 9, 2012

DIY: Bubbles

Pin It


When we began to plan our exit from the church we wanted something that was different from birdseed. Rice obviously used to be traditional but is not allowed most placed because of the danger to animals as well as the fact that it can be slippery to walk on. Another factor for us was the fact that St. Paul has a rule that you must pick up whatever you throw. Had we chosen birdseed we would have needed to have people who would be willing to stay after and sweep it all up. Other choices that were tossed out included flower petals, kind words, and my favorite: Scrabble pieces. We eventually decided to ask our photographer what would photograph the best. He told us bubbles. We decided to go with bubbles but we did not want to look like we just ordered something last minute, so we decided to do a little DIY. So here it is:

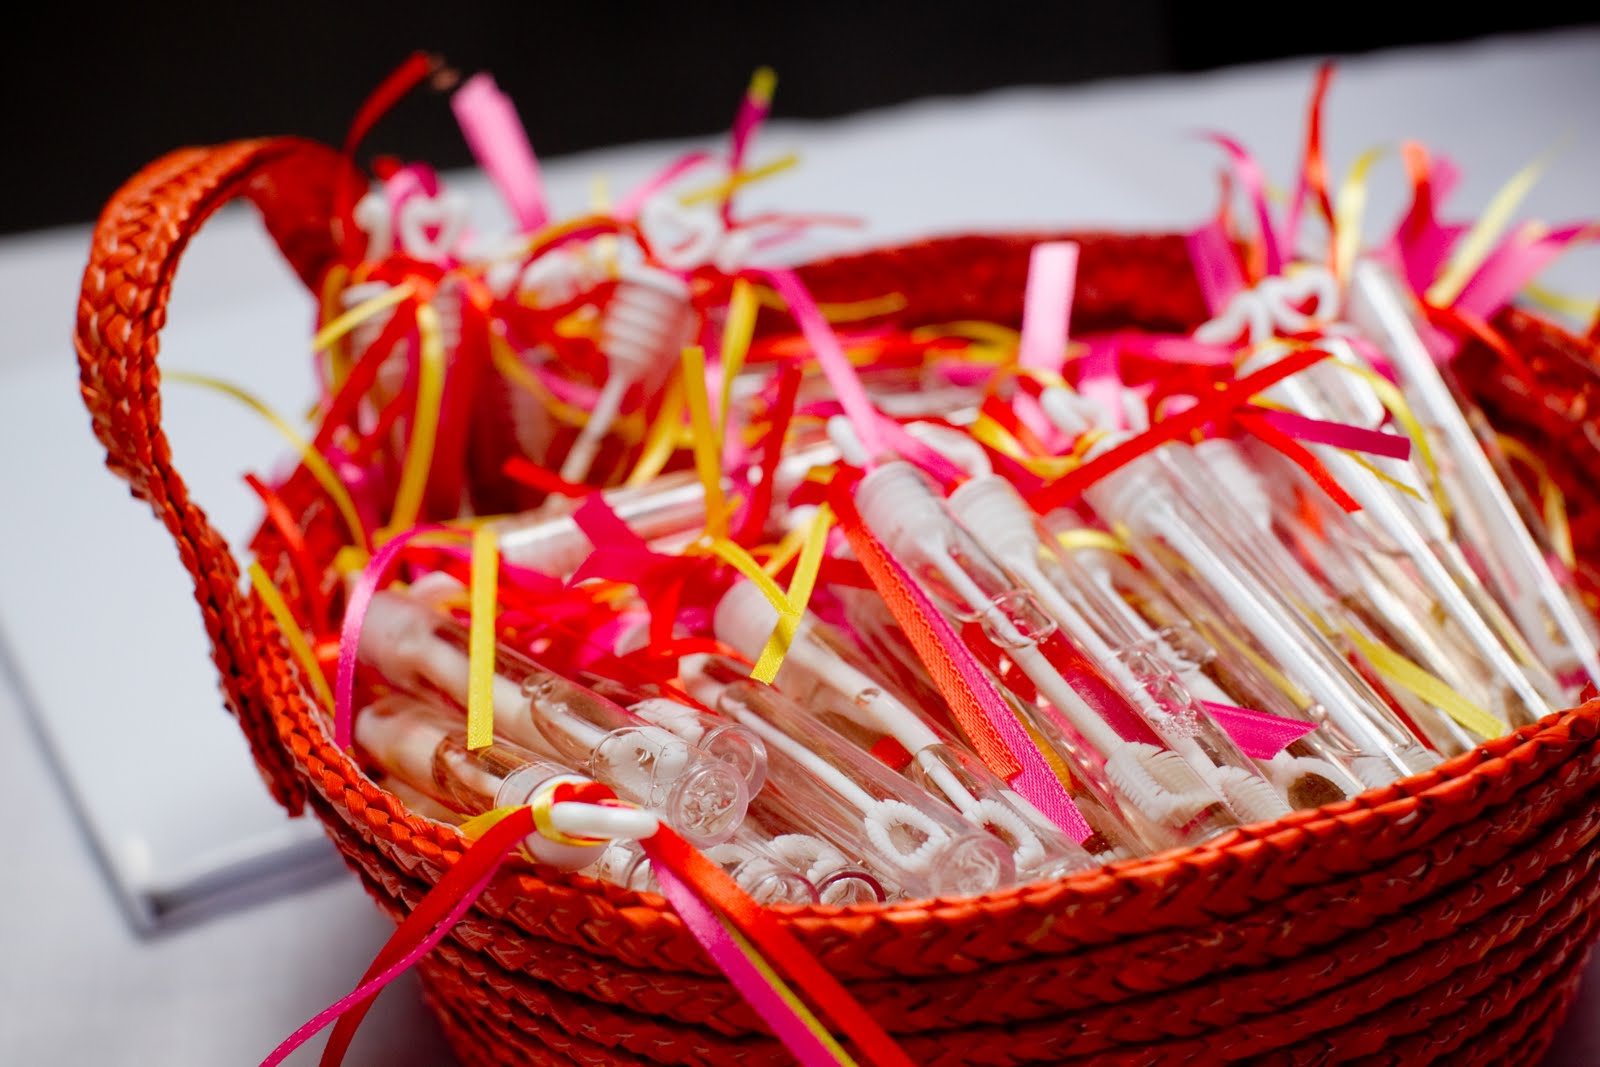
We ordered Heart Wedding Bubble Tubes- White from theknot.com (http://weddingshop.theknot.com/heart-wedding-bubble-tubes-white.aspx). If you want to order these make sure to give yourself enough time because they often go on sale. We purchased 5 packs of 48 bubble tubes at $4.99 a piece for a total of $24.95 with Shipping costing $11.77 for a grand total of $36.72 for 240 bubble tubes.

We then went to Michael Craft Store and purchased spools of ribbon in the colors: pink, orange, and yellow. We purchased "Spool O' Ribbon" spools which were 10 yards each which cost about 50 cents a piece. (Again, if you have enough time it is smart to wait for a sale and get them even cheaper.) Each ribbon tied around the top of the bubble tube was approximately 8 inches long. This means that you can get 45 ribbons out of each spool. You must remember though that each tube had all 3 colors though so that must be factored in. For each color 6 spools must be purchased in order to wrap all 240 bubble tubes.
For our 240 bubble tubes we purchased 18 (6 spools x 3 colors) spools for 50 cents a piece.
Coming to a total of $9.00.

Do not forget to consider what your bubbles will be held in to be given out to your guests. We found these orange baskets at Big Lots for only $2.00 Keep your eye out for deals.

The total cost of our 240 bubbles came to: $36.72 (bubbles) + $9.00 (ribbon) + $4.00 (baskets) = $49.72

E and I put the ribbons on the bubbles together and came up with a little bit of a system. He would take 3 spools (1 of each color) and cut them all at once so that all 3 were the same length, then hand me the ribbons, I would grab a tube and tie the ribbon. It felt like it flew by but we also chose not to do them all in one sitting. We split up our ribbon tying into 3 sessions. I would estimate that it took us close to 2 hours in all.

*Note: When you purchase your bubble tubes make sure to check that they are full when you tie the ribbon. Some of our bubble tubes came dried up and so we just purchased some cheap bubble solution and filled them back up. You do not want one of your guests to go to blow bubbles for you only to find they have been given an empty tube.

Sunday, October 23, 2011

DIY: Table Numbers

Pin It


There are many different ways to personalize the tables at a wedding. E and I originally wanted to name our tables after songs that we liked and meant something to our relationship. We figured out that many of the song names would be too long to fit onto a table marker and we did not want to spend too much money on the table markers. And then one day it came to me: we could use something we already had.
When E and I were in school he used to write me little quotes and notes on torn pieces of paper. I had saved them and one day I made a small collage out of the notes and then scanned them into the computer to make a document.

Only 2 days before the wedding (yikes!) E took the document and then used a computer program (InDesign) to make a number overlay on top of the notes. We then went to Michael's craft store and picked out some cardstock that matched our wedding colors. Then we went over to Staples and cut the papers (they let you use their paper cutters for free) to the sizes we needed and then used rubber cement to secure the numbers onto the card stock.

Word to the wise: Remember that you need 2 copies of each number! We made the mistake of only printing out one set only to begin gluing and then realized that the table numbers need to be double sided.

Materials:
cardstock
2 sets of each number
rubber cement or glue


DIY: Blackboards

Pin It


I kept reading in Bride's Magazine and Martha Stewart Weddings that blackboards were all the rage for weddings. We wanted to incorporate blackboards at our wedding but did not want to pay for pre-made ones and all the magazines suggested making blackboards yourself. Well, what the magazines fail to tell you is exactly how much making your own blackboards is and how much time it takes. So I thought I would actually lay it all out there for everybody.

We decided to make blackboards for 1) the guest seating chart, 2) the dinner menu, 3) the drink menu, 4) the cigar bar, and 5) & 6) "Mr" and "Mrs" blackboards that hung on our chairs at the wedding.

  • To complete all of this we first went down to our local Home Depot.
  • We went to the lumber section and found a large 72inch x 48inch sheet of wood.
  • When choosing your wood make sure that the grain is smooth enough that you can paint over but that the wood is thick enough that it can stand up on its own and not morph.
  • Take your huge board and go back to the "cutting" section. A lovely Home Depot worker will happily chop that sucker into any sizes you want. Thank goodness our poor helper was willing to hang in with us while we decided the dimensions of the 6 different cuts that we needed. *Make sure you know the dimensions of your cuts before you arrive.*
  • Make sure to pick up some sand paper if your wood boards are not very smooth.
  • Next, go over to the paint section and find yourself a small can of primer.
  • Then go and find the "chalkboard" or "blackboard" paint.

  • While you're in the section, don't forget that you will also need a tray to hold your paint as well as a paint roller.
  • Lastly you will need to decide how you want to write on your blackboards. Traditional chalk that can smudge or rub off or one of the new fancy chalkboard pens (used by Starbucks and large grocery stars) that will not wipe off unless wiped with a wet rag. We chose to use the chalkboard pens and we loved them! I read rumors that you can find them at Michael's craft store every blue moon and we did end up looking them up on www.chalkink.com which had reasonable prices and a huge selection of colors and sizes of pen tip but we did not have enough time to have them shipped to us. So instead we went down to our local art supply store and found the pens for $3.99 a piece (we bought 2).
Next came the actual work. Another thing the magazines fail to mention is how long it takes to make blackboards but I'm gonna tell ya. When we made our blackboards we ended up working outside so they would dry faster. We worked on cardboard in the driveway and 2 sawhorses.
So first E sanded down the boards then handed them to me to be wiped down with paper towels to remove any residue (15 minutes) then E primed each board and allowed them to dry for 30 minutes then I began to roll on the chalkboard paint. Make sure you read the back of the can because we were surprised to find out that they suggested 2-3 coats while giving each coat at least 1 hour to dry. Thankfully we found out that it does not take 1 hour for each coat to dry but that may have been because we were working outside in August. Luckily I figured out a system where if I really spent my time painting each board with long strokes then by the time I finished the last board I could loop back around to the first board for a second coat, make the loop again, and do a third coat. *Make sure that you paint all parts of the board that will be visible to guests. This includes the edges top, bottom, left and right sides. Even do the back if it will be visible to guests.*
Another thing to make sure you are aware of: You cannot use chalk on the boards for 24 hours after painting them. So make sure that this DIY is not last minute.

Materials and Cost:
Large board of wood: $8.48
Primer: $6.97
Chalkboard Paint: $9.98
Paint Tray: $1.54
Paint Rollers: $3.68
Chalkboard Pens: 2 for $7.98
Total: $38.63 and about 6-7 hours of work

Now for the fun part! Pictures!
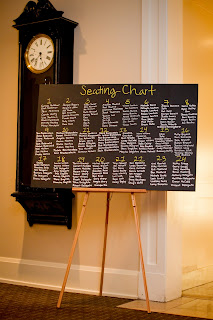
 Our seating chart blackboard greeted our guests at the door and helped us cut
down on the cost of escort cards
Our menu blackboard
The bar menu
Our cigar bar to honor my grandfather
The Mr. and Mrs. blackboards that hung over our chairs at our wedding reception
The blackboards now hang over our bed